…or “What to do if you lose Mac OS after resizing your Windows Bootcamp partition”
TLDR; Scroll to the bottom of the post where I outline the steps I took to make my Mac partition bootable again without any data loss.
I was meant to spend this afternoon completing an assignment for my course due Thursday. Instead, I nearly lost all of my programming projects dating back to when I began to take programming seriously at age twelve. This is your typical “always have and check backups story”; something I thought I was immune to – until now, at least.
It began when I decided I needed to expand my Mac’s Windows 10 Bootcamp partition. I thought this would be an easy task; I’d shrink my APFS partition from Mac OS, as Disk Utility would be the beast utility to accomplish that task, and then expand my Windows partition from Windows, as I don’t trust Mac OS to expand NTFS. Shrinking the APFS partition went swimmingly, it took about 15 minutes and apart from Disk Utility freezing, seemed to complete without a hitch.
The next step was to expand my Bootcamp NTFS partition to fill the unallocated space on the SSD. I decided to undertake this task in Windows, rather than booting a Linux live USB. The first tool I tried was the built-in Windows Disk Management, however it quickly became apparent that it cannot resize a currently mounted partition, like the Windows C: drive. So off to the internet I went, in search of a partitioning tool that could somehow accomplish this task. I landed on EaseUS Partition Master, it was a program I had heard of before and it seemed to be fairly reputable. It advertised itself as a safe way to manage partitions. This turned out, in my case, to be false.
EaseUS… meet Bootcamp.
EaseUS rebooted my machine into it’s offline partition editor, where it undertook the necessary operations to resize the partition that couldn’t of been completed whilst Windows was running. This part of the process was seemingly short, and when it completed my machine booted directly back into Windows.
My machine booted directly back into Windows. This is not meant to happen with Bootcamp, at least it hadn’t been the usual in my case. Unless otherwise specifically requested, either via System Preferences on Mac OS, or by holding Option/Alt whilst the machine was booting, my machine always booted, by default, into Mac OS. I immediately knew something was wrong. Rebooting my machine from Windows and holding Option showed the full extent of what had happened – my Macintosh HD partition was no longer being detected. A sinking feeling quickly developed in my gut as I immediately realised what had happened; that EaseUS Partition Master had somehow corrupted the Mac portion of my drive, either rendering the data intact but Mac OS unbootable, or by writing into the partition therefor corrupting the filesystem. To make matters worse, my Mac partition was encrypted with FileVault – this has been default behaviour since 10.10 Yosemite, if I recall correctly. Partitions encrypted with FileVault are virtually unrecoverable with traditional recovery tools, so any chance of me rescuing my files were close to non-existent.
After deliberating on it for a while, eventually I felt calm in knowing my files were gone. After all, I had everything backed up, right? With my major programming projects on GitHub and course-work as well as personal files on various cloud storage services, I was seriously considering just wiping the Mac partition and reinstalling Mac OS. What use was there in wasting my time trying to diagnose and repair the issue? After all I had important coursework to be completing. I called a close friend and quickly detailed what had happened, when he then brought one, glaring omission from that list above, to my attention.
All of my personal programming projects that I had not pushed to GitHub or somewhere else, including all of my “learned” projects; the projects which I’ve started since age twelve where I’ve been slowly self-teaching various programming languages and concepts, lay on this encrypted APFS partition which may or may not be completely corrupt. This partition holds the only copy of my entire self-taught progression in programming that I know of. The original copies of these files may be lying on the respective machines that I had used throughout the years, but they exist over 100kms away from where I currently am, and those hard-drives probably don’t even spin up anymore. This situation had suddenly become sentimental, as I gradually came to the realisation that the entire recorded history of my programming journey depended on what I did next.
Sidenote: I know. I’m an idiot. I should’ve made backups. And I usually do. With my important programming projects being uploaded to GitHub and various other services, I thought my backup strategy was mostly impenetrable because “how can GitHub lose my data?”. I never once stopped to consider that there was a great deal of value in all the small, incremental projects, I had undertaken over the years. And it wasn’t until I had seemingly lost it all that I realised what I had lost.
Road to recovery
My first go-to was the Mac recovery boot. I reboot the machine holding Command+R, but instead of getting the usual recovery options I instead get, well, this.
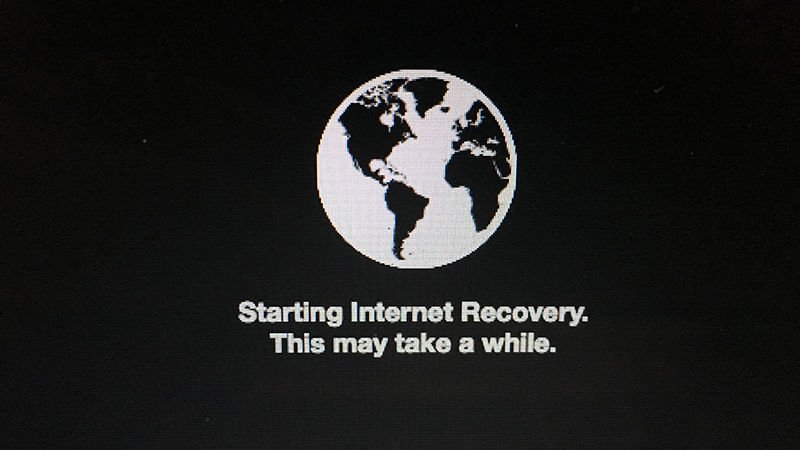
The situation had gone from bad to worse. My Mac was starting Internet Recovery from it’s firmware, meaning that not only has Mac OS been made unbootable, my Mac’s recovery partition was seemingly completely destroyed as well. I let Internet Recovery do it’s thing, and once I got to a terminal I then ran diskutil list. This is when it started to occur to me that my partition table may have been potentially damaged.
The usual, sprawling list of partitions usually outputted by diskutil had been replaced by just three, which diskutil reported as the following;
- a 200 MB EFI system partition (normal,)
- a ~170 GB Windows Recovery partition (yikes,)
- and my 80 GB Windows/NTFS partition
To get a more thorough idea of what my drive looked like and potentially remedy the issue, I booted into Windows and created a Xubuntu live USB. I’ve always had luck with the partitioning tools available in Linux; I’m particularly partial towards GParted and gdisk after using them extensively from my full-time Arch Linux period a few years ago.
First I thought it was due to EaseUS somehow altering the partition type of the Mac partition, even though there was no reason why it should’ve? I used fdisk on Linux to set the partition type to “Apple Core Storage” and rebooted, but to no avail. This was my first brash attempt at fixing the issue, but I realise now that this was a mistake as I’ll detail later.
It was at this point I started searching the web for answers. I first came across this Apple Stack Exchange post. It seemed to had matched my situation almost exactly – the poster had resized their Windows partition and then subsequently found their Mac partition unbootable. Seeing as I already had a Linux live USB with GParted handy, I thought I’d try the steps outlined in the response, which seemed to be quite detailed. What could possibly go wrong from here? I altered the flags for the Mac partition as described and rebooted holding option, hoping the Mac partition would reappear. It did not.
I then tried the second step in the post, which involved opening Disk Utility and running a repair on the disk. I ran it to no positive outcome. Although it did mention something about my Windows partition’s boot.ini, it did nothing to make my Macintosh HD partition reappear. I reboot the machine.
Black screen
And just as I thought things couldn’t get worse, they did. Now my Windows partition wasn’t booting, meaning that my Mac was officially as good as a brick. Pressing the power button just turned on the backlight, and that was about it. No error message on the display, or anything, really. I hold down Option whilst rebooting again to get to the boot device selection, which at this point listed Windows and the Linux USB. I found it interesting that Windows was still being listed despite not booting, so the partition wasn’t completely unreadable like Mac OS currently was. I boot back into Linux and test mounting the Windows partition, which I was able to mount successfully. I penned it down as a Windows bootloader issue, so I quickly downloaded a Windows 10 image and created a Windows 10 recovery USB on Linux to try and salvage Windows. At this point my focus was more-or-less on getting Windows to boot, as this was all happening during time which I could’ve been putting towards assignments, and I just needed some functioning system with Office to do them on.
I boot the Windows USB and attempt Start-up Recovery. It immediately exits indicating that it can’t find any system to repair. My next idea was then to try an in-place upgrade of Windows to try and fix the bootloader. After starting the installer and loading the partition list, it states that it’s unable to install due to the installer being booted in EFI mode, requiring GPT, and that the current disk was formatted in MBR.
MBR? Macs have never used MBR, and even with Bootcamp and a modern installation of Windows the disk should be in GPT at all times. I booted Linux again and ran fdisk, and it was here that I realised my mistake. fdisk is for MBR partition tables, not GPT, and by using it earlier I had created a hybrid MBR/GPT partition table. Whilst I stated earlier that I was quite comfortable with Linux partitioning tools, I hadn’t used them in quite a long time, and completely forgot there are two different sets of tools for both MBR and GPT. fdisk now stated this fact that I had a hybrid table in a helpful warning, which cued me to instead try inspecting issues with the GPT partition table instead.
The fix
I did some more searching, and eventually found this Apple Stack Exchange post, which proved to be immensely helpful. It quickly dawned on me that there was a possibility that my data wasn’t lost, that in-fact EaseUs Partition Master, in conjunction with my botched attempts at fixing the issue, had malformed my partition table but really nothing more or less. I boot into Internet Recovery again and try the steps outlined. One of the first steps is to view the first sector of your Mac’s APFS partition in hexdump to verify your data isn’t completely lost. Mac Internet Recovery doesn’t have hexdump, so I instead wrote the dumps of my APFS partition out to a USB drive to view in a hex editor on a university computer. By doing this, I was able to confirm that my Mac’s APFS partition was completely intact, and that no data had been lost at all.
From there, I used the gpt tool to list the partitions in the GPT table and their GUIDs, unique identifiers which describe the types of the partition to the system. When it came to my APFS partition, partition #2, it was listed as having a GUID of FFFFFFFF-FFFF-FFFF-FFFF-FFFFFFFFFFFF. This immediately struck me as incorrect. I attempted adding a new partition to index #2 as specified in the post with the APFS GUID (7C3457EF-0000-11AA-AA11-00306543ECAC), but this failed with gpt stating that there was already a partition in index #2. I then used gpt to delete partition entry #2, and then retried adding again, with still no success.
It was at this point I booted my Linux live USB again and tried gdisk. This is what ultimately fixed my machine. A short summary of what I did:
- Backed up the GPT to somewhere safe. This option can be found in the recovery menu in gdisk. For the file name, enter the full path to a safe place to store the backup. In my case, it was a USB stick, so I entered a path that looked like /media/xubuntu/usb_name/backup.bin.
- Instated a regular GPT table rather than a hybrid GPT/MBR. This will most likely not have to be done unless you’ve somehow created a hybrid MBR. You can do this in gdisk by accessing the expert options and creating a protective new MBR, but not adding partitions to it. Printing the partition table again should output your regular GPT MBR.
- Created a new partition beginning where my Mac’s APFS partition began and ending at the beginning sector plus the size of the partition in sectors. This step will not need to be done if the APFS partition is still in the table, only if it’s deleted like it was in my circumstance. The steps for determining these values are outlined in the Stack Exchange post, but I’ll quickly quote them here;
hexdump block 409640 of the SSD:
sudo dd if=/dev/disk1 skip=409640 bs=512 count=1 | hexdumpwhich results in something like this (example only):
1+0 records in
1+0 records out
0000000 4a 2e 4c 58 2c 73 22 1d 01 00 00 00 00 00 00 00
0000010 ac 01 00 00 00 00 00 00 01 00 00 80 00 00 00 00
0000020 4e 58 53 42 00 10 00 00 f6 37 ff 00 00 00 00 00
0000030 00 00 00 00 00 00 00 00 00 00 00 00 00 00 00 00
0000040 02 00 00 00 00 00 00 00 d1 67 7e 03 33 23 42 a5
0000050 a8 da 96 fc 12 ae de 21 18 04 00 00 00 00 00 00
0000060 ad 01 00 00 00 00 00 00 18 01 00 00 18 6c 00 00
0000070 01 00 00 00 00 00 00 00 19 01 00 00 00 00 00 00
0000080 10 00 00 00 80 07 00 00 0e 00 00 00 02 00 00 00
0000090 7b 07 00 00 05 00 00 00 00 04 00 00 00 00 00 00
00000a0 07 fd 03 00 00 00 00 00 01 04 00 00 00 00 00 00
00000b0 00 00 00 00 64 00 00 00 02 04 00 00 00 00 00 00
00000c0 00 00 00 00 00 00 00 00 00 00 00 00 00 00 00 00
*
0000200
The relevant line is 0x020:
4e 58 53 42 00 10 00 00 f6 37 ff 00 00 00 00 00
4e 58 53 42(NXSB) is the APFS magic block (Offset: 0x20 Type: char[4])00 10 00 00is the block size (Offset: 0x24 Type: Uint32). After reverting the byte order and converting it to decimal this is 4096 Byte which is the default size for APFS containers.f6 37 ff 00 00 00 00 00is the number of blocks in the container (Offset: 0x28 Type: Uint64)
to convert it to a decimal, revert the byte orderf6 37 ff 00 00 00 00 00->00 00 00 00 00 ff 37 f6and enter it in a converter. The number of 4k blocks is here 16,726,006 and the final size 16,726,006 x 4096 Byte = 68,509,720,576 Byte. In 512 Byte blocks that’s 133,808,048 blocks.Check the result for plausibility.
- Made sure to set the partition GUID to 7C3457EF-0000-11AA-AA11-00306543ECAC. This is the GPT GUID for an Apple APFS Partition, and the Mac firmware searches for a partition of this GUID to boot. To set this, use the set GUID option in the expert menu.
- Wrote the changes out to disk.
As soon as I rebooted, I was straight into the Mac OS log-in screen. I was able to log in successfully, and after getting to the desktop I immediately backed up my projects to an external drive. I’ve learnt my lesson, and they’ll definitely be backed up now. As for Windows, rebooting holding Option revealed that Windows was working now as well! I managed to do what I thought was impossible, salvaging both Mac OS and Windows with all my files, with the only thing I lost being time. I fought GPT, and won.
If you’ve made it this far, thanks for reading. Hopefully this helps out someone with their Mac dual-booting issues, but nonetheless writing this article was an engaging and fun experience for me. Part of the reason of why I wanted to start a blog is that every now and then I’ll have a story like this, and by writing it down not only do I consolidate the knowledge for myself, I can potentially help others in the process.
Until next time.
